A friend of mine, who is a wonderful photographer (Travis Rhoads - you should follow him on Facebook or Google+ if you aren’t doing so already) posted about a recent issue that is a great reminder for all photographers. Travis (who is a very thorough and careful guy - so it can happen to the best of us!) sent a black and white print off to be printed, and when it returned he was disappointed to find that there had been a dust spot in the digital image that was now printed out as part of the print.
As Travis noted, dust spots show up more readily in some B&W prints than they would in color, but using the technique I will discuss below, they are easier to remove while the image is still in color.
First, I’ll walk through Lightroom’s built-in spot removal ability, then show you the method I use (I can’t claim to have created it - I learned it from another photographer, but, unfortunately, I don’t recall who shared it with me. If I find out, I’ll update this post to give credit where credit is due.
1. Lightroom’s Own Spot Removal
Lightroom’s Spot Removal tool is very helpful - in fact, for many images it will bring out spots that other methods may miss. However, it isn’t perfect, and some of the things that look like spots in this tool are actually part of the image.
[caption id=“attachment_427” align=“aligncenter” width=“610”]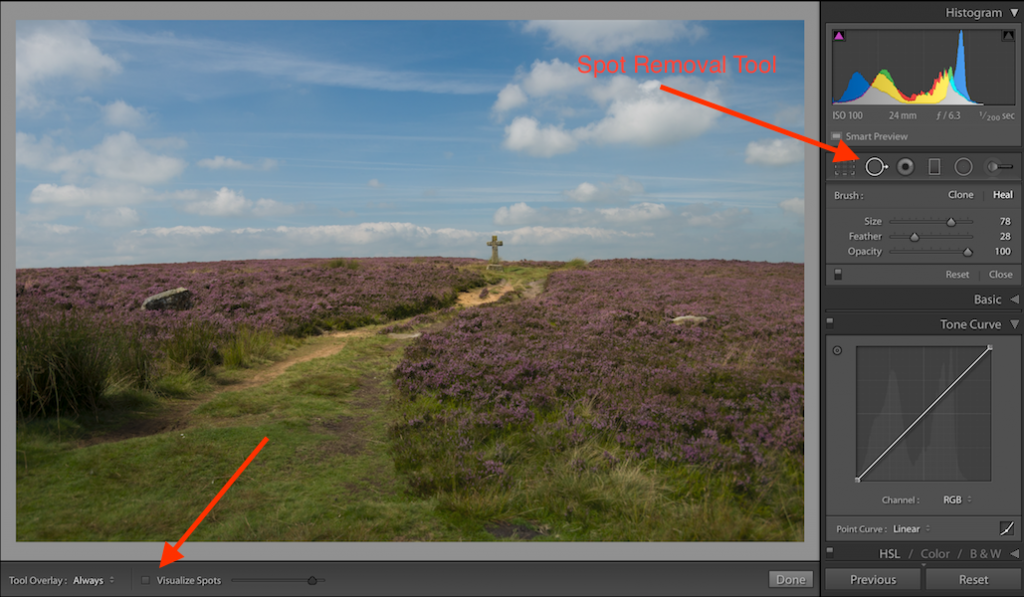 Click for larger image[/caption]
To get to it, from Lightroom’s Develop module, click on the Spot Removal tool (keyboard shortcut Q). Be aware that attempting to scroll while the Spot Removal tool is active changes the size of the tool, instead of scrolling the image.
[caption id=“attachment_428” align=“aligncenter” width=“610”]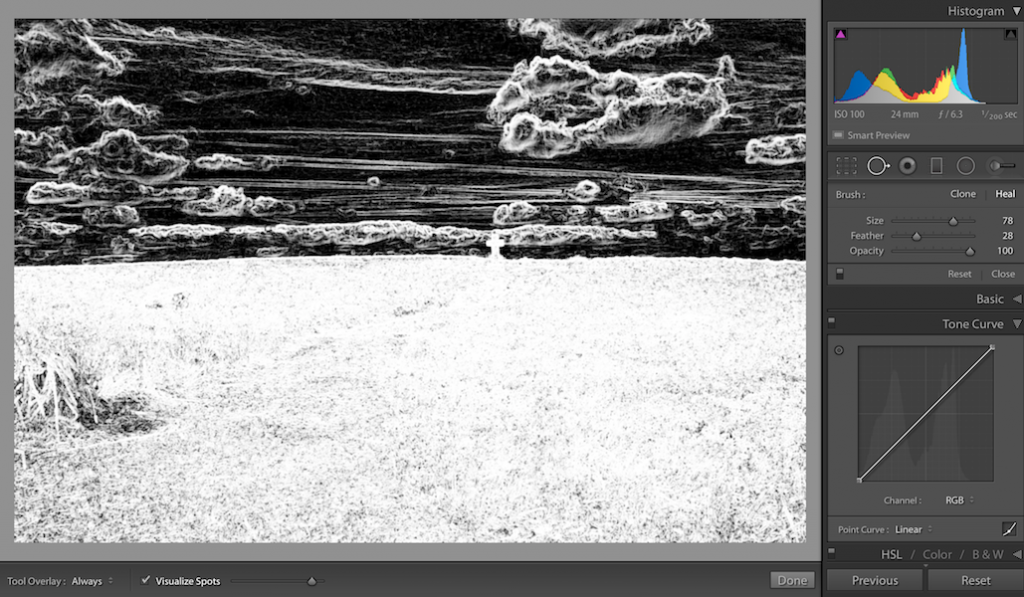 Click for larger image[/caption]
What I do is zoom in first, to the upper left corner of the image, then activate the Spot Removal tool. After that, at the bottom of the screen, click the “Visualize Spots” checkbox. You can navigate around the image by using the “Pg Dn” key (or Fn-Down Arrow on Mac) so you go over the entire image, using the Spot Removal tool to clean up any dust spots you find.
 If you look at the top, center of the image, whether in the original (top) or with the “Visualize Spots” box enabled, you probably can not see a fairly large dust spot. It seems to be hidden in the clouds (I can’t see it, and I’ve zoomed in!). The third image is a zoomed view of the area where the dust spot is located.
2. Using a custom “Dust Catcher”
You may be familiar with using the Tone Curve in Lightroom. It increases or decreases brightness in specific ranges of the image, and thereby also increases or decreases contrast, among other things. We will create a custom Tone Curve setting that allows us to see the dust spots in vibrant color.
Caution: If you routinely use the Tone Curve in your workflow, you will want to use the Dust Catcher before you change your Tone Curve settings. This will allow you to enable the Dust Catcher, do your spot removal, and reset the Tone Curve to continue with your workflow.
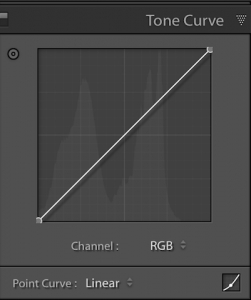 Open your Tone Curve area - the default looks like the next image.
We want to click a point on the line and drag it to the top, 10% of the way from the 0% line (the far left border), all the way to the top. Then we want to drag another point from the top to the bottom, ending at 20%. To help find these numbers, you can click the small curve icon at the bottom right, which expands the area and the vertical lines on the Tone Curve give their percentages. Don’t worry about the odd appearance of whatever image is in the Develop module - just undo whatever you have done to it after saving our Dust Catcher.
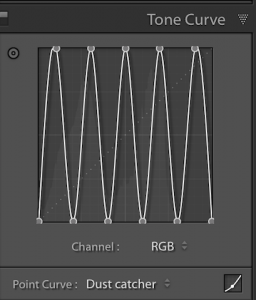 Keep repeating so that you have points along the top at 10%, 30%, 50%, 70% and 90%, and points along the bottom at 0%, 20%, 40%, 60%, 80%, and 100%, as shown in the next image. If you’re a tiny bit off (some of mine are about 0.2% off, for example), that will not be a problem.
When you have it completed, click the drop down menu (mine says “Dust catcher” in the image, but yours will say “Custom”), and click Save. Make sure it is going to the correct location if you want it to be available in Adobe Camera Raw, as well as in Lightroom. These locations are:
- Mac (user)/Library/Application Support/Adobe/CameraRaw/Curves
- Win (user)/Application Data/Adobe/CameraRaw/Curves
Name it something you like (such as “Dust catcher”).
 When enabled, you can now see the dust spot at top center in the clouds.
Now we can zoom in, enable the Spot Removal tool (but not the “Visualize Spots” checkbox!), and remove our dust spot.
 Here is a zoomed view of the nasty spot. By the way, another benefit of using the Dust Catcher is that those annoying areas where you use the Spot Removal tool, but it really doesn’t quite look perfect, can also be easily seen and corrected.
Once you have removed all the dust spots, click Done on (or otherwise exit the) Spot Removal tool, and set your Tone Curve back to Linear, or whatever other setting you like. You can now proceed with your regularly scheduled workflow.